5. CRUD with Actions
In the previous steps you set up a Cloudflare Workers app with a database, authentication, and role-based permissions. The permissions so far exist at the database level --- when you call cfDb.insert(posts), the operation checks whether the current user’s grants allow it.
That’s great for data integrity, but routes still need boilerplate: parse form data, build an operation, handle errors, return a response. And on the client side, every action button needs to know whether to show, disable, or hide itself based on the user’s permissions.
This step introduces three packages that eliminate that boilerplate:
@cfast/actions--- define reusable, composable actions that carry their own permission requirements@cfast/ui--- permission-aware UI components likeActionButtonandPermissionGate@cfast/forms--- auto-generated forms from your Drizzle schema
What you will build
Section titled “What you will build”By the end of this step, your blog will have:
- A posts list page with a data table
- A “New Post” form generated from the Drizzle schema
- A post detail page with publish, unpublish, and delete buttons
- All buttons automatically hidden or disabled based on the user’s role
Install the new packages
Section titled “Install the new packages”pnpm add @cfast/actions @cfast/ui @cfast/formsSet up the action factory
Section titled “Set up the action factory”Actions need a context provider --- a function that runs on every action request and returns the database client, current user, and permission grants.
import { createActions } from "@cfast/actions";import { requireAuthContext } from "~/auth.helpers.server";import { createCfDb } from "~/db/cfast.server";import { env } from "~/env";
export const { createAction, composeActions } = createActions({  getContext: async ({ request }) => {    const ctx = await requireAuthContext(request);    const e = env.get();    const db = createCfDb(e.DB, ctx);    return { db, user: ctx.user, grants: ctx.grants };  },});
createActions returns two functions scoped to your context provider:
createAction--- defines a single action (publish, delete, etc.)composeActions--- combines multiple actions for a single route
Define post actions
Section titled “Define post actions”Each action is a function that receives the permission-checked database client, parsed input, and user context. It returns a compose() operation from @cfast/db.
import { redirect } from "react-router";import { compose } from "@cfast/db";import { eq } from "drizzle-orm";import { nanoid } from "nanoid";import { createAction } from "~/actions.server";import { posts } from "~/db/schema";
export const createPost = createAction<  { title: string; slug: string; content: string; excerpt: string | null },  Response>((db, input, ctx) => {  const postId = nanoid();  return compose(    [      db.insert(posts).values({        id: postId,        title: input.title,        slug: input.slug,        content: input.content,        excerpt: input.excerpt,        authorId: ctx.user.id,        published: false,      }),    ],    async (runInsert) => {      await runInsert({});      return redirect(`/posts/${input.slug}`);    },  );});
export const publishPost = createAction<  { postId: string },  { success: boolean }>((db, input) =>  compose(    [      db.update(posts)        .set({ published: true, publishedAt: new Date(), updatedAt: new Date() })        .where(eq(posts.id, input.postId)),    ],    async (runUpdate) => {      await runUpdate({});      return { success: true };    },  ),);
export const deletePost = createAction<  { postId: string },  Response>((db, input) =>  compose(    [db.delete(posts).where(eq(posts.id, input.postId))],    async (runDelete) => {      await runDelete({});      return redirect("/posts");    },  ),);
Notice what you are not writing:
- No manual permission checks --- the
db.insert(posts)call carries thecreatepermission from yourdefinePermissionsgrants. If the user lacks the grant, the operation rejects. - No FormData parsing ---
@cfast/actionshandles bothFormDataand JSON input automatically. - No
_actiondiscriminator logic ---composeActionshandles routing to the correct action.
Wire actions into a route
Section titled “Wire actions into a route”When a route has multiple actions (view, publish, delete), use composeActions:
// app/routes/posts/$id.tsx (action export)import { composeActions } from "~/actions.server";import { deletePost, publishPost, unpublishPost } from "~/actions/posts";
const composed = composeActions({ deletePost, publishPost, unpublishPost });
export const action = composed.action;
The object keys become discriminators. When a form submits with _action=deletePost, composeActions routes to the right handler.
Permission-aware UI components
Section titled “Permission-aware UI components”The real payoff comes on the client. @cfast/ui provides components that read permission status and adapt their rendering automatically.
ActionButton
Section titled “ActionButton”A button that submits an action and disables itself when the user lacks permission:
import { useActions, clientDescriptor } from "@cfast/actions/client";import { ActionButton, PermissionGate } from "@cfast/joy";
const postActions = clientDescriptor(["deletePost", "publishPost", "unpublishPost"]);
export default function PostDetail() {  const { post } = useLoaderData<typeof loader>();  const actions = useActions(postActions);
  return (    <PermissionGate action={actions.deletePost({ postId: post.id })}>      <Stack direction="row" spacing={1}>        <ActionButton          action={actions.publishPost({ postId: post.id })}          color="success" variant="soft" size="sm"        >          Publish        </ActionButton>        <ActionButton          action={actions.deletePost({ postId: post.id })}          color="danger" variant="soft" size="sm"        >          Delete        </ActionButton>      </Stack>    </PermissionGate>  );}
PermissionGate
Section titled “PermissionGate”Wraps a section of UI and only renders children when the user has the required permission. In the example above, the entire action toolbar is hidden for readers who cannot modify posts.
Auto-generated forms
Section titled “Auto-generated forms”@cfast/forms introspects your Drizzle table and generates a form with the correct field types, labels, and validation. Use the exclude prop to hide fields the user should not fill in (IDs, timestamps, auto-generated slugs).
import { AutoForm } from "@cfast/forms/joy";import { posts } from "~/db/schema";
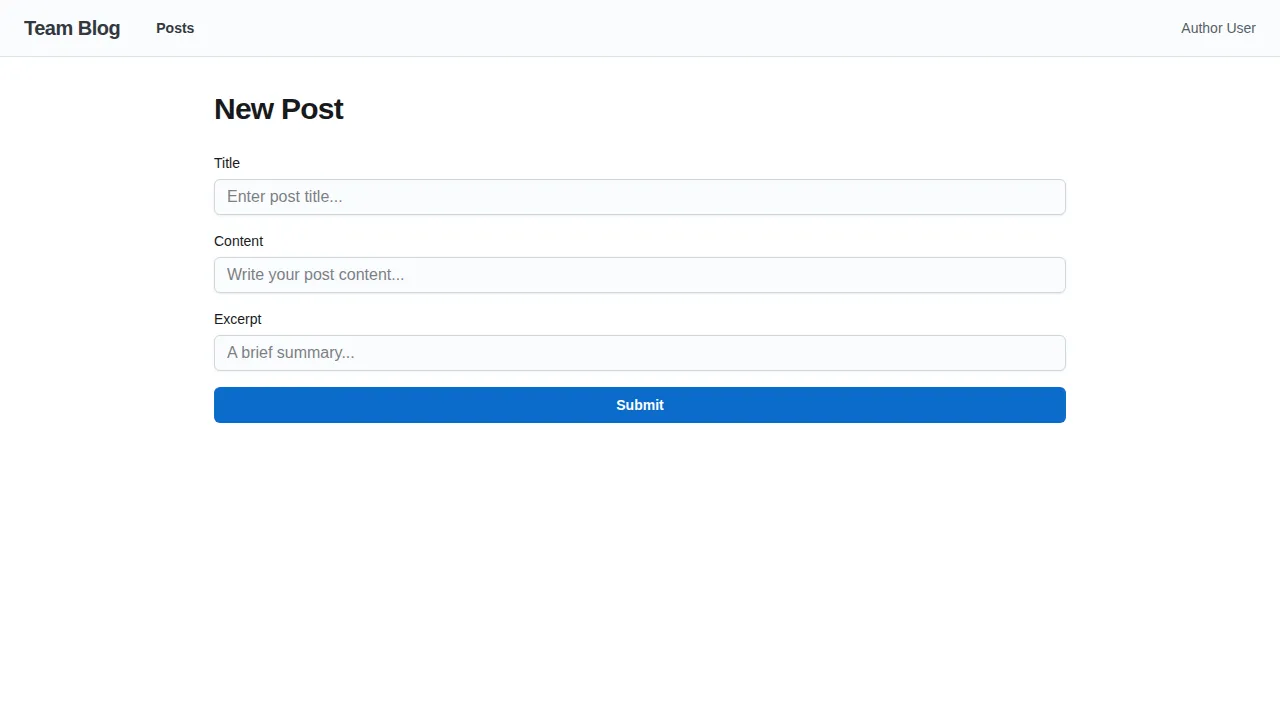
export default function NewPost() { return ( <AutoForm table={posts} mode="create" exclude={["id", "authorId", "slug", "published", "publishedAt", "createdAt", "updatedAt"]} fields={{ title: { label: "Title", placeholder: "Enter post title..." }, excerpt: { label: "Excerpt", placeholder: "A brief summary..." }, content: { label: "Content", placeholder: "Write your post..." }, }} onSubmit={() => {}} /> );}AutoForm maps Drizzle column types to input types automatically: text columns become text inputs, integer({ mode: "boolean" }) becomes a checkbox, and text({ enum: [...] }) becomes a select dropdown.
Set up the root layout for @cfast/ui
Section titled “Set up the root layout for @cfast/ui”@cfast/ui needs a plugin provider in your root layout for features like confirmation dialogs:
import { createUIPlugin, UIPluginProvider, ConfirmProvider } from "@cfast/ui";import { ConfirmDialog } from "@cfast/joy";
const plugin = createUIPlugin({  components: { confirmDialog: ConfirmDialog },});
export function Layout({ children }) {  return (    <CssVarsProvider>      <CssBaseline />      <UIPluginProvider plugin={plugin}>        <ConfirmProvider>          {children}        </ConfirmProvider>      </UIPluginProvider>    </CssVarsProvider>  );}
The post detail page with action buttons visible to an editor:

The auto-generated new post form:
How it all connects
Section titled “How it all connects”Here is the flow when an editor clicks the “Publish” button:
ActionButtoncallsactions.publishPost({ postId }).submit()- This submits a fetcher POST with
{ _action: "publishPost", postId: "..." } composeActionsroutes to thepublishPosthandlerpublishPost’sgetContextruns, authenticating the user and creating a permission-checked DB client- The
compose()operation runsdb.update(posts)--- the permission layer checks that the user has anupdategrant onposts - If the grant is missing, the operation rejects with a 403. No data is modified.
- If allowed, the post is updated and
{ success: true }is returned
The permission check is not in your route code, not in a middleware, and not in a manual if statement. It is structural --- embedded in the database operation itself.
Try it out
Section titled “Try it out”pnpm dev- Sign in as an admin or editor
- Navigate to
/posts--- you should see the posts table - Click “New Post” --- the auto-generated form appears
- Create a post, then view it at
/posts/:id - Try the Publish and Delete buttons
- Sign in as a reader and visit the same post --- the action buttons are hidden
What is next
Section titled “What is next”Your blog has full CRUD with permission-aware actions and auto-generated forms. In the next step, you will add an admin panel that auto-generates list views, detail pages, and management UI from your schema --- in one route.